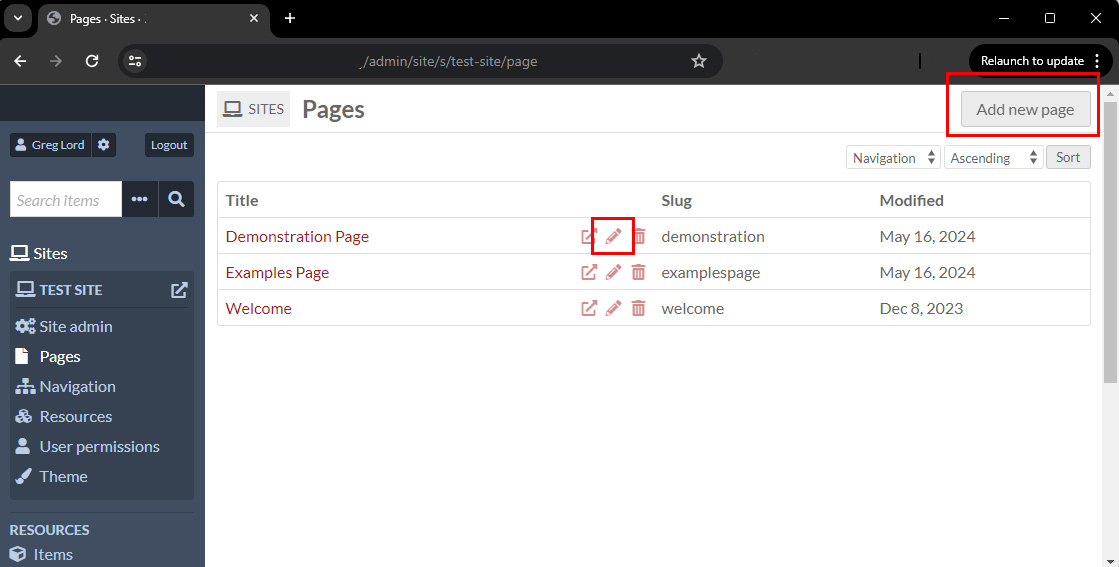
The Pages menu will show you a list of all pages that are part of your selected Site. (This might appear as an empty list if this is your first Page.)
To begin, you can either click the Edit button (pencil icon) beside a Page you’d like to work on, or click “Add new page” in the upper right corner of the Pages menu to get started.
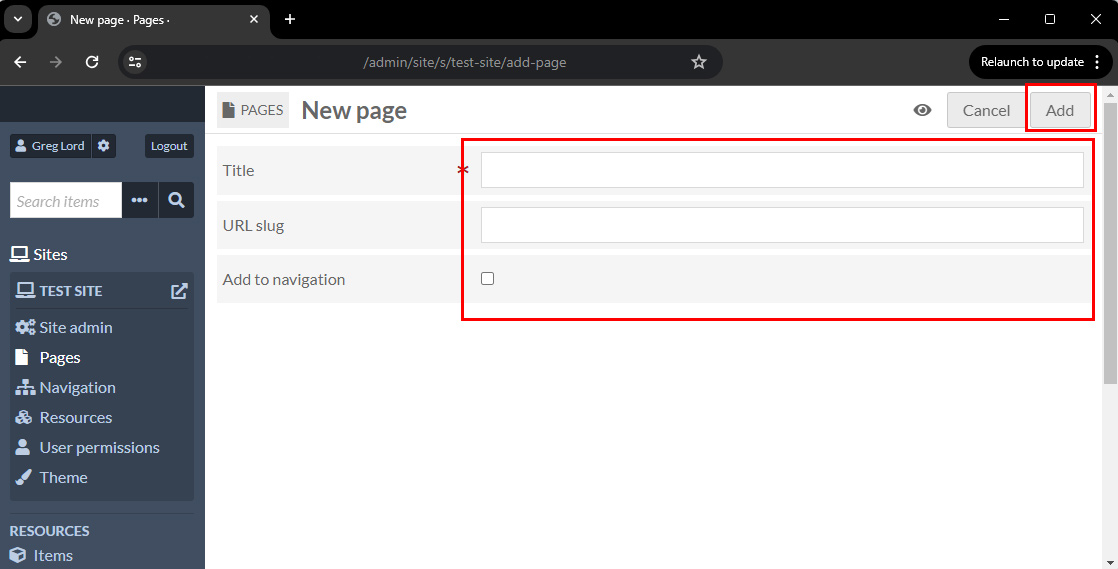
From the “New Page” screen, you can define the basic properties of the page. This includes the Page’s Title (the name of the page as it will display on the site), and URL Slug (same as above, this is used as the page’s web address and should ideally be short and easy to type). For now, let’s also check the Add to navigation box, which will automatically create a link to this page on the home screen of our Site. (We can always uncheck this, or edit our Navigation menu, in the future.) When you are finished, click “Add” in the upper right corner to save the page.
You will be taken to the editing screen for your Page, where you can begin to add or edit the Page’s content. (To get back to this at any point in the future, you can select your Site, click Pages in the left Dashboard menu, and click the Edit button (pencil icon) next to the Page you want to edit.)
For now, let’s test adding content to this page by clicking the “HTML” button in the right menu. This will add a block of HTML to our page that we can edit and add whatever text content we wish.
 \
\
Let’s test this by adding a brief bit of text to the new HTML block. By clicking into the text editor, you will see a menu open above it with text formatting options. This includes your normal document editor features such as paragraph styles, bold, italic, hyperlinks, etc. Type something here and we can test saving and viewing the page.

When you have typed something, click “Save” in the upper right corner of the screen. You will see a green message “Page successfully updated” when it saves. From here, you can click the “View” button to preview the page.

When you click “View” a new browser tab will open that shows you what the public will see when they view this Page. You will see your HTML block as the main section, with the content that you typed, and you will notice a link to your page (and any other pages in your current Navigation) above the page as a horizontal row of text links. (This is your Site’s “Navigation,” which we return to editing later.)

Adding HTML blocks makes up the bulk of the custom Page content in Omeka S, and we can add as many HTML block as we like. An example of this workflow would be to add an HTML block as an introductory text section on a page, and then to display Omeka S Items (our collection objects) below, followed by as many other HTML blocks and Items as we need to create the type of Page we want. (We’ll add these Items next!)
From here we can switch back to our Edit tab and continue editing the Page.
Next, in the right menu, click the “Media Embed” button to add another block to the Page.

The Media Embed block lets you choose one or more Items from your collection to display on a block of your page. This will display after your HTML block since it appears below it on the page. (You can click and drag on the “Move” icons, represented by three horizontal lines beside the name of each block, to rearrange these blocks.)
Click the “Add attachment” button to open a menu (on the right of the screen) that lets you pick from you Items. You can also type the Item name in the search box that appears, to find a particular Item. (This becomes especially useful once you have large numbers of Items in your Omeka S environment.)
Click an item to select it, and then click “Apply changes” at the bottom of this menu (or, you can first add a caption in the box above it if you wish), to add this Item to the Media embed block. You will see that Item (and its thumbnail, if it has Media like an image, etc.) appear in the “Attachments” heading.
Repeat this step for a few more Items until you have a few items in this Attachments section.
Before hitting Save, as a last step, change the “Options” menu items to create a more visually interesting layout for your objects:
- Change “Layout” to “Horizontal”
- Change “Image Type” to “square”
When you have these settings updated, hit “Save” again in the upper right of the screen, and hit “View” to preview your changes.
You will now see both your previous HTML block, and also a grid view of your Items, arranged into an evenly-sized layout that pairs their Media thumbnails with their Titles and any captions you added.

These thumbnails and titles are also links to the individual view for those items, which will display them alongside their full metadata.

You can continue adding Pages, editing Pages to include more HTML blocks or Media Embed blocks, or a variety of other options, to create the right context for the Items in your collection, and to create a Navigation that lets users easily browse through your collection.