Section Overview/Introduction
An African proverb guides the National Museum of African American History and Culture’s (NMAAHC) approach to oral history interviewing, collecting of oral histories, and the honoring of these stories:
“When an elder dies, a library burns to the ground.”
Elders have lived extraordinary lives filled with love, unbelievable challenge, activism, and advocacy. They have experienced historic events, sometimes even agitated for them, and hold wisdom for following generations. Elders are experts on their own history and authorities on historical events they experienced. They are libraries of information that you can help preserve for your generation and other generations to come.
When planning and conducting an oral history interview, the NMAAHC wants interviewers to remember this and use it to guide how they plan for an interview. Tulani Salahu-Din, a Museum Specialist at the NMAAHC, reflected on her experience interviewing her father and reminds people to:
“…always remember that the oral history interview is a sacred space, based upon trust and a mutual understanding. Your narrator…is an authority on their own life. Your role is to engage with them and get clarity into their experience.”
Planning
File Management
To make your life, and the lives of everyone involved in this project, easier choose two digital “places” where all notes, files, and documents will be stored. One will be the main digital workspace, and the other will be a back-up.
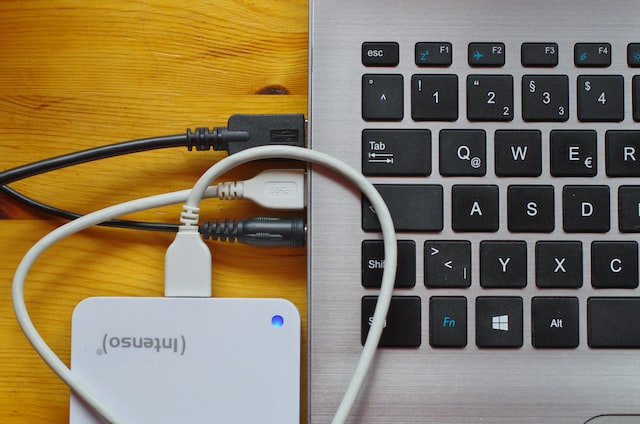
For example, a main digital workspace for your team may be a shared Google Drive. This is where all files (meeting notes, resources, documents, interview permissions forms, audio files, etc.) will be stored, shared, and collaboratively worked on. All these files can be downloaded and backed up to an external hard drive, the second digital “place” for your project. Ideally, you want to never have to use the secondary backup. But if you find yourself in a place where something has gone wrong, you will be glad the secondary backup is there! Regularly backup your files, and life will be good!
We recommend setting up a dedicated email account to share all documents with or use as the main contact for the project. For example, if you create a Gmail account you can work out of that account’s Google Drive or back-up all documents to the account’s Google Drive as a third back-up.
Another key aspect of file management is naming all your files consistently and to not include spaces in file names (using underscores _ or hyphens – is a recommended best practice). Leaving spaces in titles may result in errors in downloading or sharing files. This will help you find what you are looking for and keep track of versions.
If you already have a file naming convention that you use, great! Keep it up! But if you would like some ideas, here are examples of how files can be named:
- Audio files
- Intervieweelastname_firstname_YYYYMMDDdate of interview_interviewerlastname_audio_version
- Following this convention
- an audio file of an interview of Viola Davis by Tracee Ellis Ross on December 1, 2022 that has not been edited would be saved as this:
- Davis_Viola_20221201_ Ellis_Ross_audio_Unedited.mp3
- an audio file of the same interview that has been edited would be saved as this:
- Davis-Viola_20221201_ Ellis_Ross_audio_Edited.mp3
- An audio file of a second interview that has not been edited between the same two people would be saved as this:
- Davis-Viola_20221209_ Ellis_Ross_audio_Unedited.mp3
- Transcript files
- Intervieweelastname_firstname_YYYYMMDDdate of interview_interviewerlastname_transcript_version
- Following this convention
- A transcript file of an interview of Viola Davis by Tracee Ellis Ross on December 1, 2022 that is a draft that has not been sent for approval would be saved as this:
- Davis_Viola_20221201_ Ellis_Ross_transcript_vDraft.doc
- If that same transcript file has had some edits to it that need to be sent back to the interviewee for approval, it would be saved as this:
- Davis_Viola_20221201_ Ellis_Ross_transcript_v01.doc
- When that same transcript has been fully approved and is completed, it would be saved as this:
- Davis_Viola_20221201_ Ellis_Ross_transcript_vFinal.doc
The above file naming conventions will naturally group like files together if the files are sorted by name. It is also helpful for keeping track of versions.
These naming conventions also work for any other files associated with your project. Just swap out the names and dates for ones that are relevant to the file.
It is important to note that nearly every step in this toolkit encourages you to make a list, brainstorm and draft, or do something similar. Make sure to save your notes from every stage of the process to both the main digital workspace and the secondary backup space! Notes about your process will help future phases of your project go smoothly and they can be very valuable if you want to launch other similar projects.
File Types
General best practices for oral history interviews are to record/save audio-video files as .MP4 and record/save audio-only files as .WAV, instead of .MP3.
MP4 files contain digital audio, video, and (sometimes) subtitle information that work well with many different softwares and operating systems. If you choose to do video interviews and have access to a camera or system that records something other than MP4, that is not a problem! A copy of the video can be saved and converted to an MP4 without issue.
WAV files are audio files that have converted the sound to bits, or “pieces,” that digitally reconstruct the frequency, tones, and sound of what was recorded. WAV files are uncompressed, meaning that there are more bits (especially at the top and bottom of the frequencies) that better digitally capture the sound that was recorded. But they are much larger files and will take up more memory space in the project’s digital workspaces. MP3 files are compressed, meaning that some of the bits have been left out to “squeeze” the bits down and make the file smaller as well as more portable. It is less authentic and accurate to the original recording audio, however, it is easier to upload, download, and “move” around digitally.
Copies of WAV files can be compressed and converted to MP3 files, but copies of MP3 files cannot necessarily be “uncompressed” into WAV files. If possible, record as a WAV and create copies that can be converted to MP3 files. The WAV files can be retained in your project’s archive and MP3 files can be used for digital exhibits.
However, if capturing an MP3 file is the only option, then record it! While it is important to capture the best audio possible, recording interviews (especially those of elders) while it is possible is most important.
Support and Roles
A key aspect of launching a successful oral history project is identifying a support team and each person’s roles and responsibilities. Before any planning begins, identify who will be part of the project team, who might be a support, and who may have talents that can contribute to the project. Below is a list of roles and responsibilities for you to consider. Many projects operate with small teams, so often people will have multiple roles and responsibilities.
- Project Management (often the project lead, can be a more than one person)
- Community (interviewee) outreach and coordinator
- Interviewer outreach and coordinator
- Scheduler
- File manager (digital files and any physical documents)
- Secretary
- Graphic design
- Social media coordinator
- Promotion and communication
- Audio editor
- Transcriptionist
- Exhibit technology support (depends upon the type of exhibit you create)
- Website designer
- Video editor
- Podcast editor
- Project archivist
Goals and Purpose
A critical first step in planning your oral history project is to identify the goals and purpose. Save your goals and purpose in a document, along with any notes or drafts that helped you get there.
The following questions can be helpful in refining the goals and purpose, or the vision, of your project.
- What is your “why”?
- What do you want to learn and preserve?
- Who holds this knowledge and experience?
- What might be their “why”?
- Why might they want to participate in an oral history interview?
- Who do you hope will learn from these oral history interviews?
- How might the oral history interviews be used?
- What is the final product that you want to create for the interviewees and for your target audience? This will also be useful in identifying technology, which will be discussed in a later section.
- On a website?
- Social media?
- For research?
- A documentary?
- A podcast?
- All the above?
- How will the oral history interviews be recorded?
- Virtually?
- In-person?
- Either?
When considering the final product, keep the words of our Director Dr. Angel David Nieves in mind, “small and successful.” Planning a small deliverable, especially for the first phase of your project, will ensure that you deliver to your elders and interviewees as promised. This will also give you the tools and experience to take on larger final products as the project develops and iterates.
The goals and purpose do not need to be overly complicated- it can be to preserve the stories of people who are important to you and your community. Or perhaps the purpose is to better understand the history of places, spaces, and events that need to be known or that have never been properly preserved in the first place. Or perhaps to create intergenerational community and understanding. Or maybe you want to celebrate the lives and experiences of a particular generation or group.
There is no one “correct” purpose for an oral history project. If the purpose is built on honoring the expertise of your elders and interviewees, respects their authority in their history, uses and shares them in an agreed upon and respectful way, and is built upon mutual trust and co-creation, then it is “correct.”
Below is an explanation of the goals and purpose of the Black Artists of Boston project, which this guide is partially built upon.
Shavaun Sutton, Sociology PhD Student, and Janika Dillon, World History PhD Student, two graduate students who were interviewers and co-creators during the first phase of the Black Artists of Boston project, wrote:
This project began as an experiment in community-based learning led by Professors Angel Nieves and Doreen Lee. With the help of community organizer Dzidzor, we were assigned to work with eight elders from the Black artists community in Boston’s South End and Roxbury neighborhoods. These artists included a DJ, a fiber artist, a dollmaker, a singer, a dancer, a poet, a painter, and a folk artist. The goal of the project was to document their stories through recorded oral history interviews and to find a way to represent their art in a way that would be useful and beneficial to these elders.
Another important goal of the project was to use Northeastern resources to reckon with its past broken promises by helping a community that has been historically displaced and marginalized by the University. Over the course of the semester we read and discussed books like Complaint! by Sara Ahmed, The Allure of the Archive, and many articles about the skills and mindset needed to successfully collect oral histories in an ethically and culturally sensitive way. Each student was responsible for recording interviews, reflecting on their process, creating field notes, transcribing an interview, and creating a mutually-beneficial final project to document a portion of each elder’s artistic contribution. At the conclusion of the semester, students, faculty, administrators, community leaders, and elders attended a celebratory luncheon where each artist was honored by their students and class projects presented on a big screen.
We hope this project will not be a one-time event but will become an ongoing collaboration between Northeastern and the Black Artists of Boston community.
Timeline
It is critical to think about the timeline your project is working within. This will help you set deadlines for the project, schedule interviews, and plan exhibitions or celebrations.
Your oral history project may be an ongoing effort and span years- and that is fine! But it is important to identify smaller milestones and timelines. This will help the project not feel so overwhelming. Setting smaller goals will also help you refine your processes, promote the efforts of your interviewees and interviewers, and get more people interested in contributing.
Select a key date or event that you would like to complete this first phase of your oral history project by.
Is there an anniversary? A reunion? A graduation? A holiday?
You will use this date to “work backwards” and create a timeline of milestones. It should be noted that timelines and deadlines often need adjustment, especially with projects that depend upon scheduling, co-creation, and participation. Use your timeline as motivation to keep moving through the steps of the project, but be flexible and open to change, especially if changes need to occur to accommodate elders.
For your first oral history project, plan for at least six months to go from planning phase to first presentation.
Below is an example timeline with a goal that phase one is completed for a Juneteenth celebration.
- January
- February
- Indentify interview subjects and reach out with project summary to solicit participation.
- Create a framework of five to six interview questions that can be adapted to fit all interviewees.
- Start looking for spaces that can host Juneteenth celebration
- March
- Interview subjects
- Continue research on information to enhance interviews and fill gaps (ie, did they mention specific places/spaces? could they not recall a particular date of an event? iron that out)
- Order catering (if necessary) for event
- April
- Start editing interviews
- Follow up with interviees about any questions raised during interview process
- May
- Begin sending invitations for Juneteeth celebrations
- Finalize edits for interviews; send to interviewees for final approval
- Social media blitz featuring snippets of interviews
- June
- Make any necessary fixes to interviews, if any.
- Iron out any last-minute event planning issues.
- Contact local news outlets that may want to cover the event
- June 19th
Identifying Elders and Interviewees
After your goals, support, and timeline have been sketched out, consider who you want to interview. Begin making a list of advocacy organizations, clubs, or other groups whose past and present members you want to interview. List any communities, like Black artists in Boston, or scenes, like the local Hip Hop culture and scene, or other groups of folks who hold the knowledge and experiences you want to interview them about.
Begin listing names of individuals who you would want to ask to be a part of, and contribute to, your project.
It is important to note that time is critical for elders who have exceptionally long lives, or who may have deteriorating health conditions. Their history and experiences should be recorded as soon as possible. Prioritize these interviewees so their stories can be recorded, they can engage in the co-creation process as much as possible, and they can be celebrated for their contribution while they are with us
Identifying Interviewers
Almost as important as identifying the interviewees is identifying the interviewers. Your project purpose and goals may already have interviewers “built in.” For example, if the project is part of a class curriculum, then the students are already identified as your interviewers.
List who will be conducting the interviews.
Consider how their age, personality type, interests, background, and positionality may influence their connection to interviewees and the outcome of the interview.
For example, a high school student who is a percussionist may be an ideal interviewer for an elder who is a musician.
This will be helpful for matching interviewees with interviewers.
Compensation
Much more work goes into oral histories than just the recording. Elders and interviewees are not just laboring during the interviews, they are giving their physical and intellectual labor during pre-interview conversations, when filling out the necessary forms, when approving transcripts, and (if they choose to do so) looking for and sharing any photos or other “things” to accompany their stories. They are providing an immense service and should be compensated for their time and labor.
Conversations about compensation should happen with your organization early and be clearly articulated before reaching out to potential interviewees.
If you are working with a budget:
- What is the budget?
- How much is allocated for oral history compensation?
- Are interviewers being compensated as well?
- If compensation is $150/interviewer and $250/interviewee, how many interviewees can you have?
- What paperwork or forms will interviewees need to complete in order to be compensated?
- When can they expect compensation to be processed?
If you are not working with a budget:
- What other forms of compensation are possible?
- Will interviewees be able to choose what form of non-monetary compensation is best for them?
- What is the approximate timeline that they can expect compensation to occur?
- If a potential interviewee declines, and it may be due to the lack of monetary compensation, what will the project’s “go to” response be so the relationship is maintained?
Outreach
Once your list of potential interviewees and interviewers is completed, it is time to start reaching out!
Prioritize outreach to potential interviewees, as they are the holders of knowledge and centerpiece of your project.
This should start as early as possible and proceed at a pace dictated by the potential interviewees trust, not by project deadlines or expectations. As the BlackSpace Manifesto said so well, “move at the speed of trust.”
While there will be some potential interviewees who commit to the project during the first conversation, many times it will take several phone calls, emails, or in person conversations to build the relationship.
When reaching out to potential interviewees, be sure to communicate:
- Goals and purpose of the project
- Why they are invaluable to the project
- Who will be conducting the interview (this can be general, such as “high school students in X class” or “young people in X program”)
- Potential uses of their oral history
- Planned final “product” and exhibit
- Any plans for a celebration or launch of the project
- Participation expectations
- Pre-interview conversations
- Paperwork related to compensation, permissions forms, and biographical information
- Interview
- Review of transcript
- Compensation
It can be helpful to create a spreadsheet in your project’s shared digital space that tracks the following information:
- Name of potential interviewee
- Any organization or group affiliation (did you reach out to several women who were AKAs during the 1970s? Listing this can be helpful!)
- Name of oral history project you are contacting them about
- Date of contact
- Mode of contact
- Project participation (yes, no, maybe: needs follow up, etc.)
- Notes
Gathering Your Equipment, Tools, and Materials
Below are examples of tools and materials needed for an oral history project. The tools and materials needed for each phase or project will depend upon how you plan to conduct the interviews and what final product you have promised to the elders and interviewees.
Forms for Interviewees (examples for each can be found in the next sections)
- Informed consent and permissions form
- Biographical information form
- Description form
- Compensation forms, which may include
- Payment information
- Coordinate with the financial contact of the granting agency
- Tax forms (W-9, I-9, etc.)
- Coordinate with the financial contact of the granting agency
- Information related to non-monetary forms of compensation
Forms for Interviewers (may not apply to all projects)
- Service learning or other class related agreements
- Coordinate with instructor
- Compensation forms, which may include
- Payment information
- Coordinate with the financial contact of the granting agency
- Tax forms (W-9, I-9, etc.)
- Coordinate with the financial contact of the granting agency
- Information related to non-monetary forms of compensation
Recording Equipment
Below are only suggestions based upon past oral history projects, prioritize the expertise and experience of musicians and other creatives who are part of the project
- Virtual (remote, online) recording
- Virtual meeting platform account
- Zoom (audio only, or audio and video capable)
- Zencastr (audio only, or audio and video capable, free account creates MP3s/paid account creates WAVs)
- Or another virtual meeting platform you may already be familiar with
- Google Voice number (audio only recording of a phone call)
- Or another phone call or audio only platform you may already be familiar with
- In-person recording
- Portable Digital Recorder(s) (does not depend upon a computer to record)
- TASCAM recorders are popular among oral historians and have a range of price points (audio only)
- Zoom recorders are also recommended and have a range of price points (audio only)
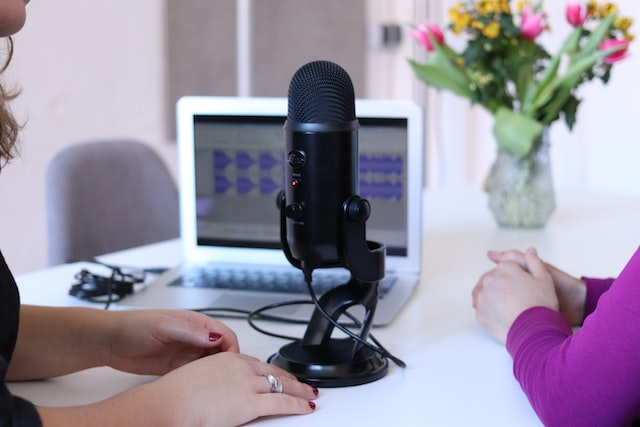
- OR USB microphone (Requires a computer and Digital Audio Workspace software, audio editing program, or video editing program)
- Blue Yeti mics are popular choices because recording settings can be adjusted for group conversations, solo recordings, entire room capture, or two-person conversations
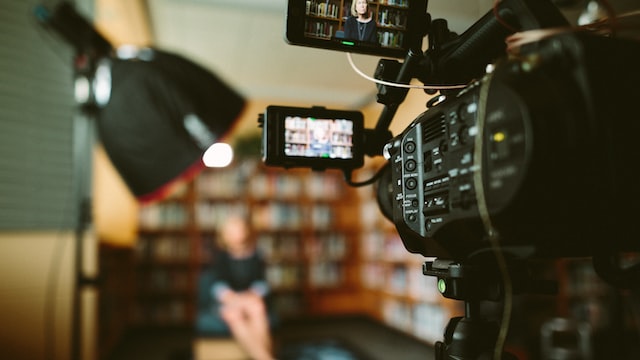
- If recording video, a 4K or HD capable camera
- Accessory bag for equipment (type depends upon recorder, microphone, and or camera)
- Extension cord
- Back-up batteries or power-source
- Back-up SD card (or other memory card for your recorder or microphone)
- Small tripod (type depends upon your recorder or microphone)
- Taller tripod (type depends upon camera, if you are recording video)
- Pop-filter and/or windscreen (type depends upon your recorder or microphone)
Audio and/or Video editing Software
- Audacity (audio only, open access, free of charge)
- Shotcut (audio-video, open access, free of charge)
- Other open access, free of charge audio-video options
External Hard Drive (for file backup)
- Any external hard drive with enough space will do
Field Note System
- Interviewers will actively take notes during conversations, while doing background research, and during the interview to help them remember to return to a subject or ask a question
- Decide upon how you would like field notes to be collected
- Each interviewer could have a folder in Google Drive or a similar cloud service where they keep their notes
- Field notes during the interview might be with pen and paper, then typed after
- Communicate the system to the interviewers and include it in the checklists you create for the project
Important
While it is important to capture the best recording possible for the interviewee and the project, sometimes projects take an unexpected turn, or a new opportunity comes up and you’ve just got to work with what you’ve got! If an Android or iPhone on a table or a tripod to capture video is what is available, then do that.
Test all equipment with all computers and devices that will be or may be working on this project. Download all necessary drivers or software updates ahead of time and, if your operating system updates, be sure to test the equipment compatibility again.
Checking equipment frequently and well ahead of any recording is an excellent habit to establish. Tech issues will come up- better to work through them in the office rather than at an elder’s home!
Drafting an Interview Guide
Interview guides are helpful for ensuring interviewers ask questions about key events or stories, can help if there is a lull in the conversation, and can help interviewees who may interrupt themselves with side-stories or tangents regain their focus.
When drafting your interview guide, it is important to remember that it is a guide. Oral history interviews are conversational, not interrogations. Encourage interviewers to ask questions about unexpected topics that may come up, let the interviewee guide the conversation, or add questions to the guide specific to their pre-interview research of the interviewee.
Below is an example of an interview guide for the Black Artists of Boston project. It is geared for artists, but it can and should be adapted to the interests, community, or other group your interviewees identify with or are the center of your project.
Potential Interview Questions
This is JUST a guide, please do not ask all the elders all these questions. The intention is for the interview to be organic and human not robotic!
- Introductions
- Introduce yourself and ask them to introduce themselves
- Please ask them how they are doing. Greetings and opening small talk help as ice-breakers.
- Questions about Childhood:
- Where were you born? Where did you grow up?
- How would you describe the community you grew up in? How did it change over time? What did you want to change about it?
- What is your favorite or most important memory about the place you grew up in?
- Who influenced you the most when you were a child?
- Questions about Art:
- What kinds of stories did you express through your art when you first began your career as an artist?
- What made you realize that this was something you wanted to pursue as a career? Who and/or what influenced your practice? Who and/or what inspires you as an artist?
- Why is art important to you? Why do you think your art is important? What kinds of messages have you tried to convey through your art? What has been their reaction or response to your work?
- Tell us about the first time you bridged your artistic practice with your interest in community issues. How did you come to make this connection?
- In what ways do you feel your artistic practice changed once you began to address community concerns?
- Describe the first time you had a public audience for your work. What was this experience like for you? How did this influence your approach to your art thereafter?
- How do you view the relationship between art, politics, and history?
- What challenges have you faced as an artist? Why is art meaningful to you? How has your community responded to your art? What role do you think your art plays in your community?
- What is the connection between your art and your culture and community?
- What have been the key decisions and choices you have made in your artistic practice to convey your story or stories? What effect has conveying your own story through your art had on the way you conveyor collaborate with other people’s stories? What has been your approach to relaying the stories of collective memory or displacement through your art?
- Questions about Activism:
- What role has activism played in your artistic practice, and vice versa?
- What kinds of issues interest you?
- What has motivated you politically, socially, and culturally to get involved in activism?
- What do you hope to achieve through your activism?
- What has been the most difficult thing about being an activist? What has been the most rewarding?
- How has your own personal history influenced your activism?
- Culture, Community, and Identity Based Questions:
- What do you consider to be your culture? In what ways do you identify with it? What influence does it have on your life? Your work? Your activism? How would you describe your culture?
- With what community do you feel a sense of belonging? How does your sense of community relate to your sense of culture? How has your identification with your culture and your community changed and evolved over the years?
- Conclusion:
- How do you think your art and activism affected or influenced the communities you’ve worked with? How do you think your art and activism has changed over the years?
- What questions should we have asked you? Was there a connection or issue that you think is important to address in your community that we have not talked about?
- Would you like to add anything else before we end the interview?
Forms: Permissions, Rights, and Informed Consent
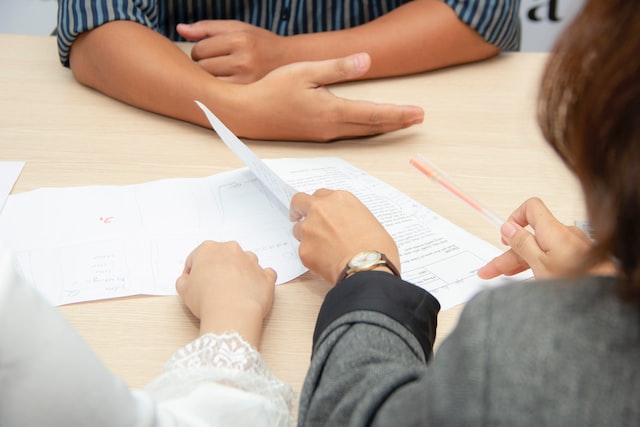
Permissions and rights forms that explain why the interview is being recorded, how it will (and may be) used, and providing a space for interviewees to dictate any usage restrictions is critical to gaining their fully informed consent.
Below is an example of the permissions and rights form for the Black Artists of Boston project. This is followed by a guide to help interviewers explain the permissions form to interviewees so they are fully informed what they are being asked to consent to and sign.
Service-Learning Community Engagement Agreement
INSH 5602/Spring 2022/Documenting Fieldwork Narratives/Lee & Nieves & Maharaj
PURPOSE: The purpose of the project is to explore the history of Roxbury through the stories and artistic work of community elders. Students will work in teams of two (2) to explore these stories and build a digital artifact, yet to be determined, in collaboration with their community partners.
PROCEDURES: Interviewers will record participants’ life stories using video, or audio depending on the preference of the interviewee. Participants can choose to discuss any aspect of their lives and they may refuse to answer any questions. Two interviews will be conducted: a pre-interview (less formal) and a more formal interview. Interviews normally take about 1–1.5 hours, but participants may take as long as they would like and are free to stop the interview at any time. The larger project seeks to promote decolonial and anti-oppressive oral history methodologies as it seeks ways forward through a co-creation and co-curation model with project partners..
RISKS AND BENEFITS: Describing life experiences can be upsetting and emotionally
difficult, while also empowering. As the student projects could contribute to a public exhibition of some kind, as well as a website, with your permission, your story will be heard in a variety of contexts.
Thank you for your participation and your willingness to share your historical memories, creative work, and/or knowledge with the Northeastern community. By signing the form below, you are giving your permission to the interviewer/interviewers named below to interview you by video and/or audio recording, and to use your interview as part of a research paper and/or project, which will be eventually incorporated into a publicly available online website. Below we included some key points of agreement that are rooted in respect and community for each participant involved:
- I understand that:
- The Interviewer may use my image, voice, and other personal characteristics in photographs or in videotapes, audiotapes, or other media in connection with the interview/my artistic work (*however it will always be credited). I agree that the Interviewer may use, reproduce, exhibit, distribute, broadcast, and digitize my name, likeness, image, voice, recordings and transcripts, and any other contribution by me in the Work, in whole or in part.
- My interview will be stored at the Northeastern University archives for long-term preservation and that it may be removed should I decide it is no longer being properly administered by NU’s Archives and Special Collections.
- This agreement gives community members assurances that the Northeastern community are not going to have any ownership over any of the art or art practices that the elders might share with us. We are simply holders of the digital versions of the files and curated stories.
- Additionally, we would only show images online (if the elders gave their consent to do so).
- Northeastern University will provide the elders with an honorarium as a way to recognize their partnership and work in addition to honoring their contributions to the overall project.
- I understand that this release is binding on me, the interviewers, and the Northeastern community.
I HAVE CAREFULLY STUDIED THE ABOVE AND UNDERSTAND THIS AGREEMENT. I VOLUNTARILY AGREE TO PARTICIPATE. I HAVE READ THE ABOVE AGREEMENT AND MY SIGNATURE BELOW IS CONFIRMATION OF MY AGREEMENT AND PARTNERSHIP ON THIS PROJECT.
INTERVIEWEE:
NAME (please print) ______________________________________________________
SIGNATURE ____________________________________________________________
Date___________________________
INTERVIEWER:
NAME (please print) ______________________________________________________
SIGNATURE ____________________________________________________________
DATE: _________________________
Permissions Discussion
You should see the points below as a starting point for your discussion with your elder and a way to begin to build a certain level of trust by seeking permission. Securing permission is an essential part of gaining trust and making real the co-creation of this work in partnership with an elder. READ THIS CAREFULLY.
Boilerplate Language:
- We’re taking this course on “Documenting fieldwork narratives” to think about how history, memory, and archiving are important tools to document community experiences.
- We are interested in how our methods of documentation have historically excluded marginalized groups and how to address that in our methods.
- One main goal is to showcase our immediate community neighbors and how their experience of making a creative life and cultural community can enrich our understanding of Boston.
- Secondary goal is that we are co-creating the project with you. This is a collaborative project and you are the driving force. We hope to provide a venue or vehicle for the stories that you feel are missing or are important for your community and your work as an artist.
Permissions Review:
- To record using whatever device or taking notes on your discussion (whatever platform that is agreed upon)
- This is a 2-part interview – the first interview is just a conversation where are getting to know each other, more informal
- Share community agreement – highlight that it is a work in progress – have them look it over in their leisure/time and then give feedback
- Emphasize that it is a LIVING DOCUMENT
- Dzidzor would give more information about this
- W9
- Students ask the elder if they are comfortable filling out the W9 giving it to Dzidzor or filling it out online
- A reminder not to discuss compensation
- Interviews should not run more than an hour/ an hour and a half
- Don’t end abruptly
- Permission for any photos or video
- Also permission for recording or photographing next interview
Forms: Biographical information and description
Asking interviewees to fill out a form with their basic biographical information and self-descriptions can be helpful for several reasons. First, rather than reading through transcripts or listening to oral histories for this information, it will be readily available at a glance. Second, it allows the interviewee to describe themselves and their story with the words and phrases they know to be most accurate to themselves and their life. It can be helpful for any exhibits or additional “final products” created with the oral histories. Third, descriptive information is important to the act of archiving this piece of history.
Below is an example of a biographical information and description form used by the developer of the UNC Story Archive, inspired by the Mass Hip Hop Archive’s approach to collaborative archiving.
UNC Story Archive: Story Description
To provide essential and accurate contextual information for researchers interested in using our collections, we ask contributors to provide as much information about your story that you feel comfortable sharing publicly. We will use the information you provide to compose a description of the collection and assign your selected keywords, which will be available and searchable online.
This is your space to create keywords and subject headings for your story, in your words.
For more information about keywords and subject headings, and why they matter, please click here: https://tinyurl.com/KeywordsSubjects
Section 1
Self-identification
1. Name:
2. Pronouns, Gender Identity, and/or Sexuality (Share to whatever extent you are comfortable)
3. The University Libraries has adopted a policy to describe contributors to collections by racial, ethnic, tribal, and other similar self-identified categories. In the field below, please describe the racial, ethnic, tribal, and/or other categories that best describe you and the community you identify with. If you do not wish to self-identify, please type “I decline to state”.
4. Age at time of recording
5. Place of interview (example: In my living room in Durham, North Carolina)
Section 2
DESCRIPTION KEYWORDS
Please list keywords you would use to describe your story in your voice. These can be vernacular or “code words” used by you and your community. The keywords can be phrases that better describe your ethnicity, race, religion, and/or group identification. Keywords can be self-descriptions, locations, place, spaces, and any other phrases you see fit.
For more information about keywords, and why they matter, please click here: https://tinyurl.com/KeywordsSubjects
6. Please separate keywords with a semicolon (example: non-traditional student; grad student; adopted)
NAMES AND OTHER PHRASES
Please list names and places that are important to your story. Also consider spelling out any acronyms and listing any idiomatic words/phrases that you think a listener might have difficulty spelling.
7. Please separate names, words, and phrases with a semicolon. Example: Buster; VA (Veterans Affairs)
Interviewers and Interviewees
Matching interviewers and interviewees
Oral history interviewees are not just being asked to record stories and their experiences, they are really being asked to be vulnerable and give a piece of themselves to the process. This requires trust and care in order to make it a positive and fulfilling experience for interviewees.
It is important that interviewees are matched with interviewers who they can communicate and establish trust with. During outreach to interviewees and conversations about the progress of the project, take note of any interests that might help make a good match with an interviewer. Ask if there are interests, backgrounds, or demographics that they prefer and might make it easier to connect to an interviewer. For example, elders in previous projects have stated that they would not feel comfortable being interviewed by white students due to past experiences.
Pairing interviewees and interviewers should be a collaborative process, when possible.
Below is the text from a PowerPoint slide deck created by Shavaun Sutton, Sociology PhD Student, and Titilayo Odedele, Sociology PhD Student, about how these pairings were determined for the Black Artists of Boston interviews.
You will notice that a two-part process is explained. The first part addresses methods to assess and pair interviewers together into interviewing teams. This may only partially apply to your project, or not at all. The second part is about pairing interviewees (participants) with interviewers.
A Short pre-Conversation guide
By Shavaun Sutton, Sociology PhD Student, and Titilayo Odedele, Sociology PhD Student, 2022
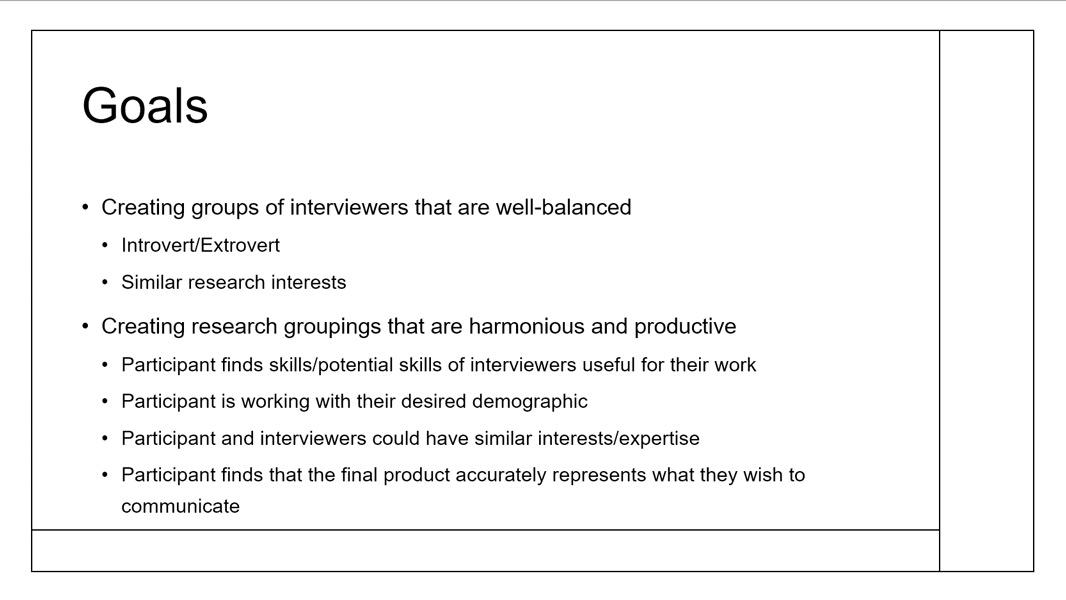
Goals
- Creating groups of interviewers that are well-balanced
- Introvert/Extrovert
- Similar research interests
- Creating research groupings that are harmonious and productive
- Participant finds skills/potential skills of interviewers useful for their work
- Participant is working with their desired demographic
- Participant and interviewers could have similar interests/expertise
- Participant finds that the final product accurately represents what they wish to communicate
Recommendations for Preparatory Logistics
Sessions
Arrange class/working sessions in a way which allows interviewers to fully participate in their projects and have a space for learning and reflection. Consider shortening/replacing sessions on weeks where interviewers are busiest
Tools
Give interviewers their tools and resources for those tools beforehand, including guides which demonstrate how to utilize hardware and software
Pay
Finalize compensation process and make interviewers and participants aware of the process and amount
Documentation
Get documentation for consent to record and share information as applicable (voice, face, art, etc.). The institution will not acquire the rights to any products without the participant’s genuine permission
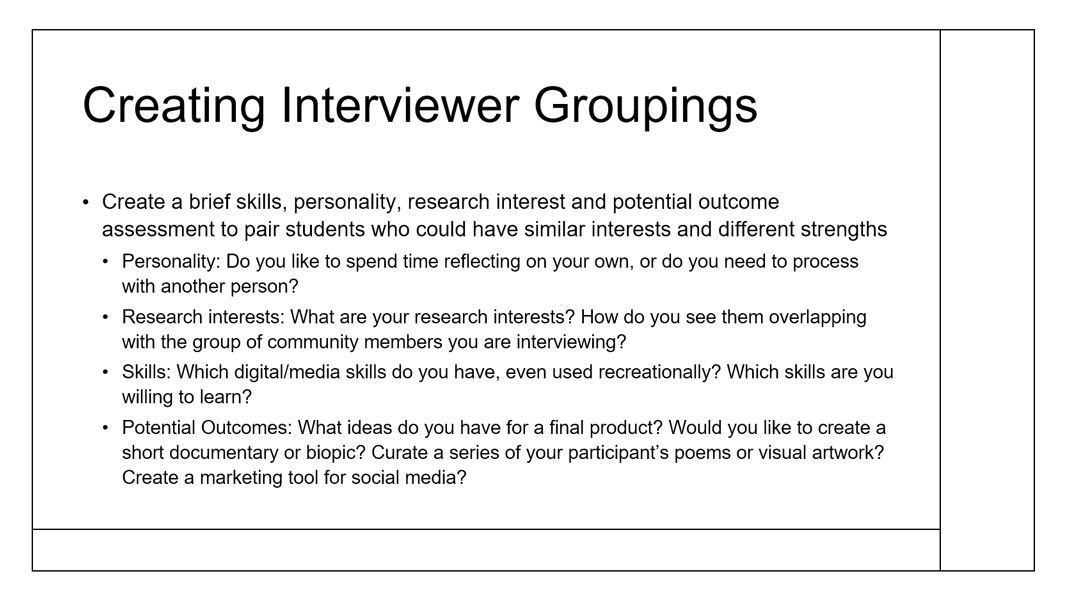
Creating Interviewer Groupings
Create a brief skills, personality, research interest and potential outcome assessment to pair students who could have similar interests and different strengths
- Personality: Do you like to spend time reflecting on your own, or do you need to process with another person?
- Research interests: What are your research interests? How do you see them overlapping with the group of community members you are interviewing?
- Skills: Which digital/media skills do you have, even used recreationally? Which skills are you willing to learn?
- Potential Outcomes: What ideas do you have for a final product? Would you like to create a short documentary or biopic? Curate a series of your participant’s poems or visual artwork? Create a marketing tool for social media?
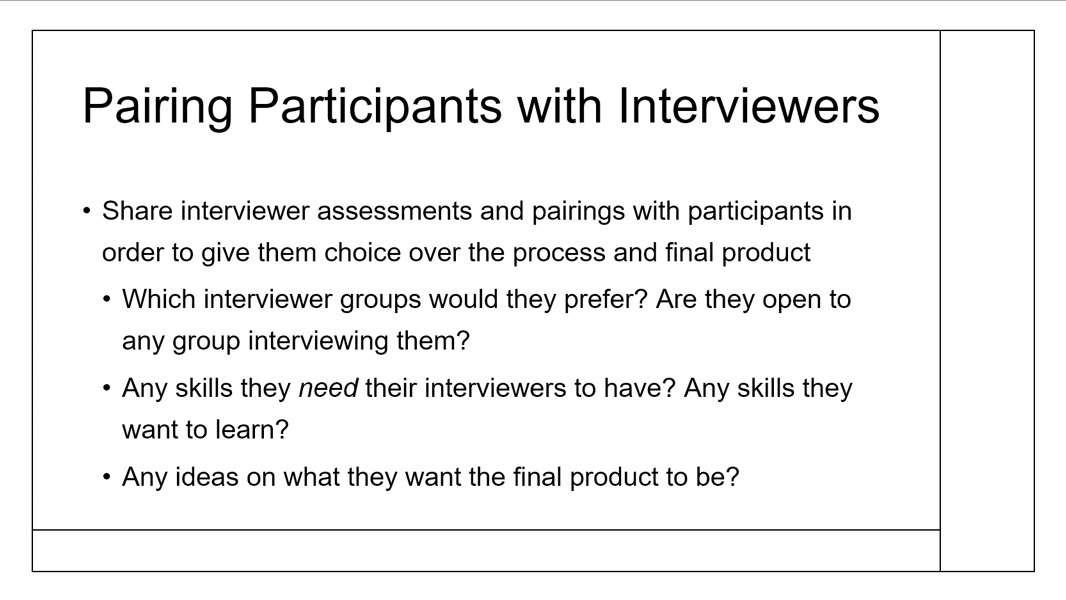
Pairing Participants with Interviewers
Share interviewer assessments and pairings with participants in order to give them choice over the process and final product
- Which interviewer groups would they prefer? Are they open to any group interviewing them?
- Any skills they need their interviewers to have? Any skills they want to learn
- Any ideas on what they want the final product to be?
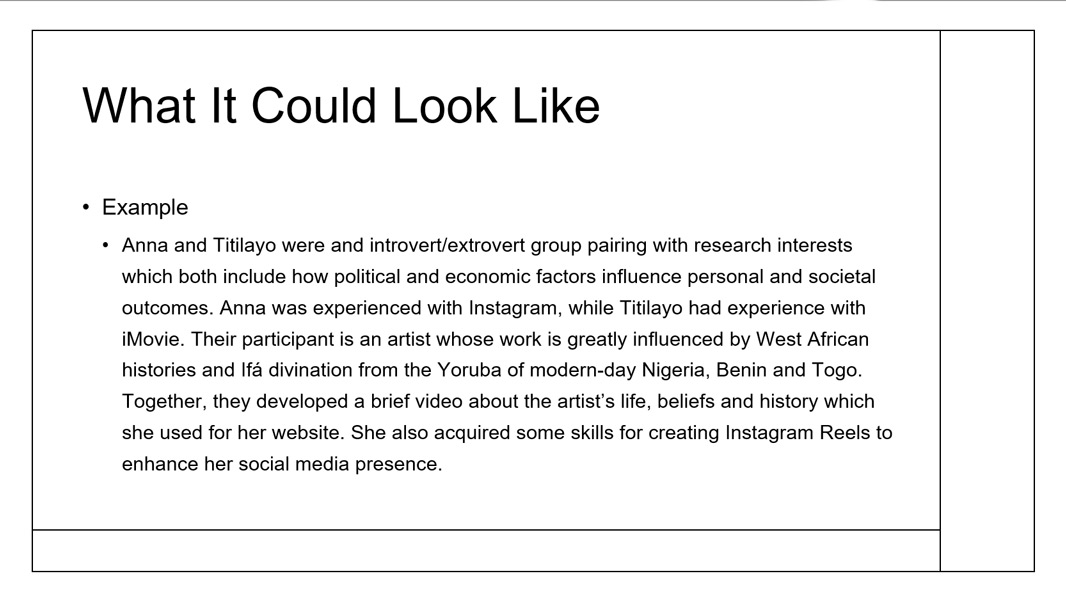
What It Could Look Like
Example:
Anna and Titilayo were an introvert/extrovert group pairing with research interests which both include how political and economic factors influence personal and societal outcomes. Anna was experienced with Instagram, while Titilayo had experience with iMovie. Their participant is an artist whose work is greatly influenced by West African histories and Ifá divination from the Yoruba of modern-day Nigeria, Benin and Togo. Together, they developed a brief video about the artist’s life, beliefs and history which she used for her website. She also acquired some skills for creating Instagram Reels to enhance her social media presence.
Scheduling
Scheduling pre-interview conversations, the interview itself, and any post-interview conversations as far ahead and at the convenience of the interviewee is important.
It can be helpful to use a spreadsheet to track who has (or has not) been scheduled, any rescheduling, and locations (in-person or virtually). It is also helpful to put all scheduled conversations into a shared online calendar and “invite” both the interviewee and the interviewer. A Google calendar, or something similar, works great for this. But do encourage interviewers to have frequent communication with their interviewee via email, phone, or other means if the interviewee is comfortable with this. Certain key interview conversations should be scheduled, but not every aspect of the trust building conversations need to be.
Below are examples of spreadsheet categories you can use to help with scheduling.
- Elder or Interviewee Name
- Interviewer(s) Name(s)
- Pre-interview meeting (date and progress)
- Interview meeting (date and progress)
- Follow-up meeting (date and progress)
- Location of meetings (in-person address, Zoom, Zencastr, etc.)
- Reminders
- Notes
Researching
It is important that interviewers do some background research about the elders and folks they will be interviewing. This enables interviewers to add meaningful and specific questions to the interview guide. It also demonstrates to the interviewee that care has been put into the process and it can save them time from explaining basics about their lives, leaving more space in the interview to dig into specifics and deeper stories.
Interviewers should take notes of their background research and their pre-interview conversations with interviewees.